Follow the guidelines below to set up email functionality through SPS when your company uses Gmail as an emailing platform.
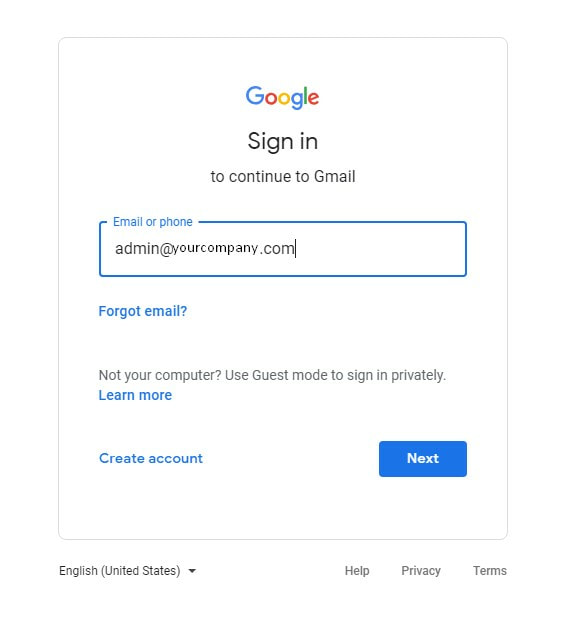
Go to admin.google.com and log into the administrator account for your company's emails.
STEP 1:
SET UP A NEW USER
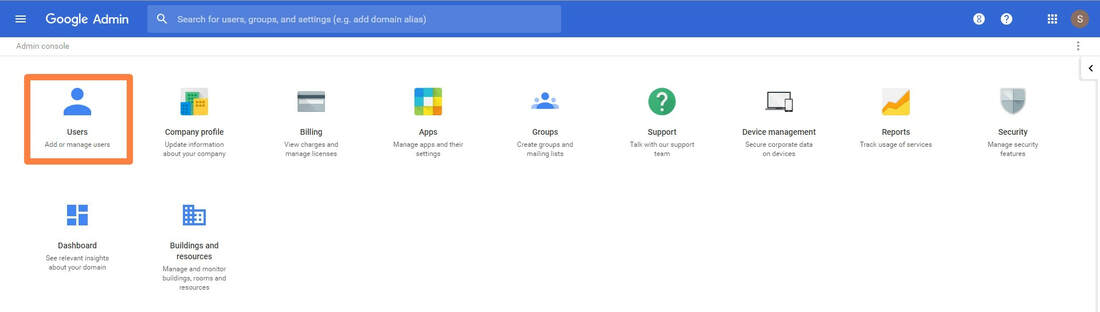
After logging in to your Google admin account, you should see your admin menu on admin.google.com.
Click "Users" from the menu.
Click "Users" from the menu.
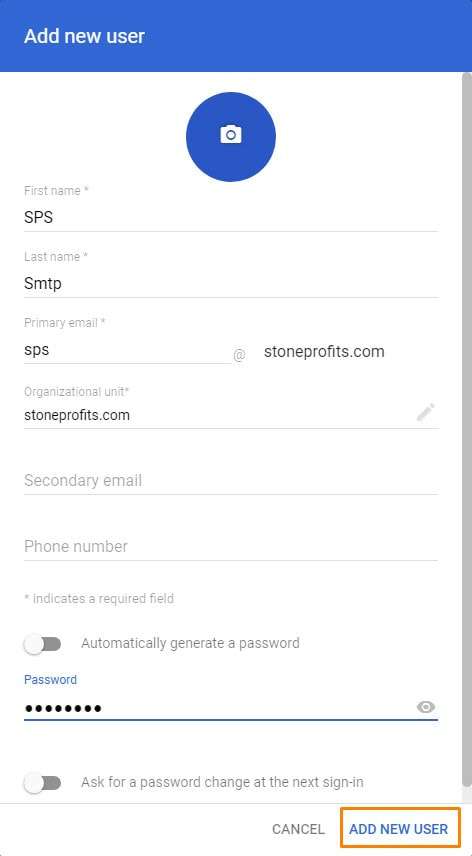
Add a new email account to your company that will be used as the outgoing email account for emails from your system.
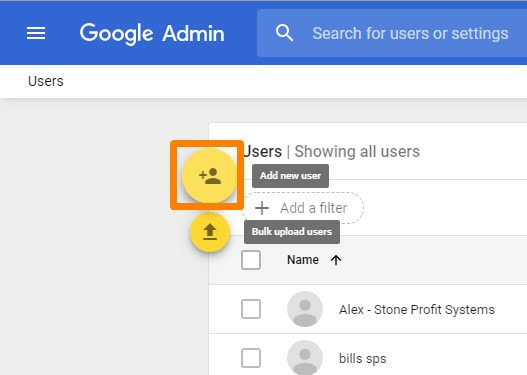
Enter the information for the new email account. Please use "sps" as a prefix for the email account (example: sps@yourcompany.com)
ENABLE SECURITY SETTINGS
Login to your email account and click on below link
https://myaccount.google.com/lesssecureapps
https://myaccount.google.com/lesssecureapps
Or If you want to allow it for all users in the email domain follow below steps:
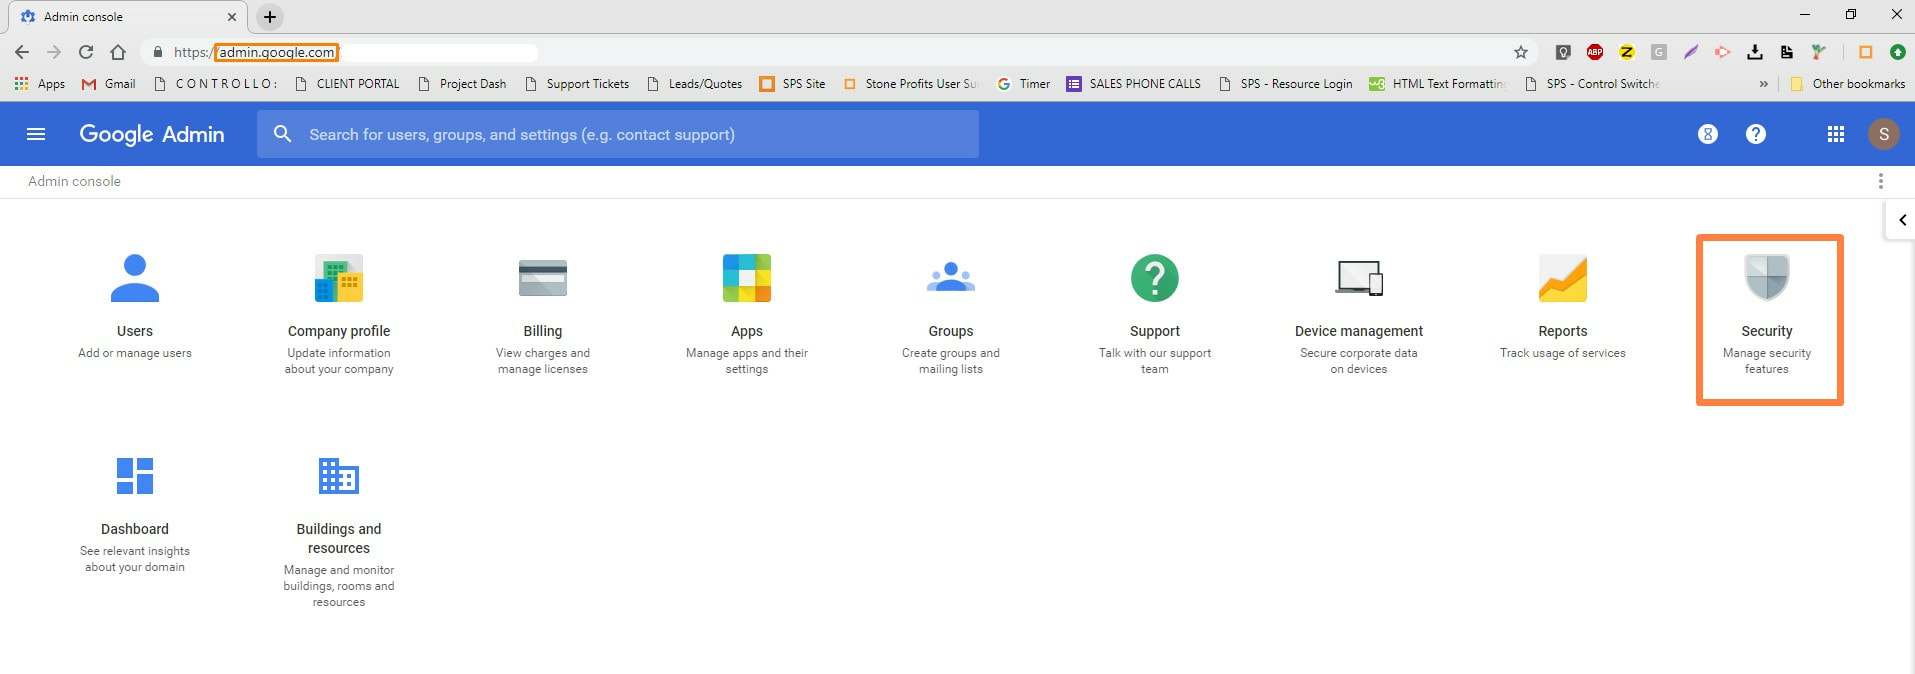
Click "Security" from your Admin menu
Or If you want to allow it for all users in the email domain follow below steps:
Click "Security" from your Admin menu
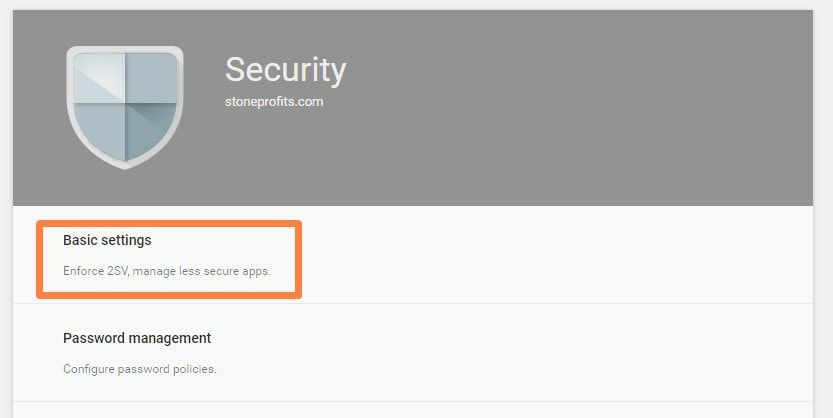
Click on "Basic Settings" under Security, then click the link "Go to settings for less secure app >>"
 |  |
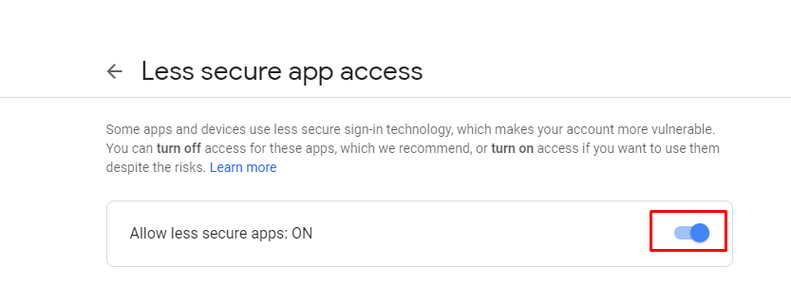
Ensure this setting is selected to "Allow users to manage their access to less secure apps"

STEP 2:
ADD EMAILS TO YOUR LIST OF "SEND AS" ACCOUNTS
This step is optional. If you do not want to go through the steps of adding each individual employees' email address to the list described below, ALL emails sent from SPS will show the reply address being the newly created email account from the first steps outlined above. This is not recommended if your customers will need to reply directly to specific users at your company.
Go to mail.google.com and log into the new email account you've created for emailing SPS(sps@yourcompany.com).
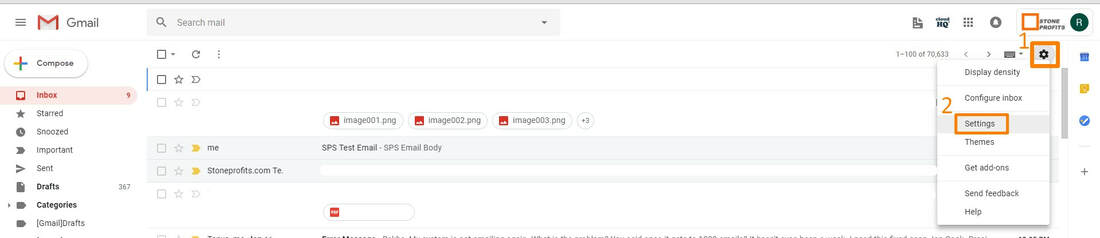
From your Gmail page, click the gear icon on the top-right of the page to click "Settings"
Go to mail.google.com and log into the new email account you've created for emailing SPS(sps@yourcompany.com).
From your Gmail page, click the gear icon on the top-right of the page to click "Settings"
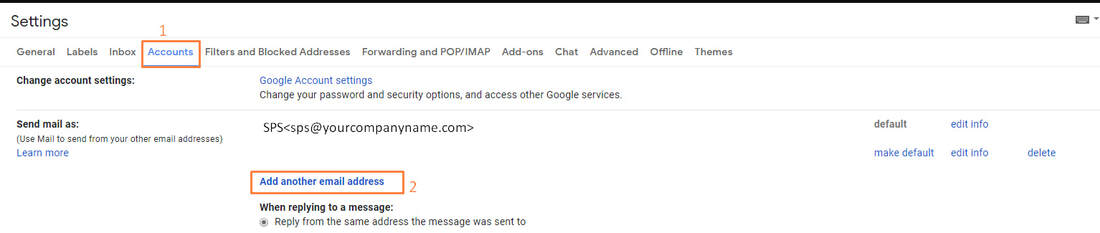
In the "Accounts" sub-menu of your settings, click "Add Another Email Address" to add an email account that will send emails from SPS.
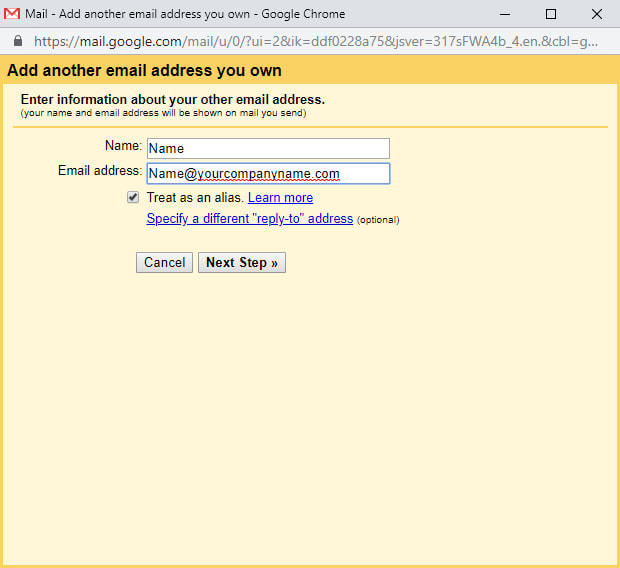
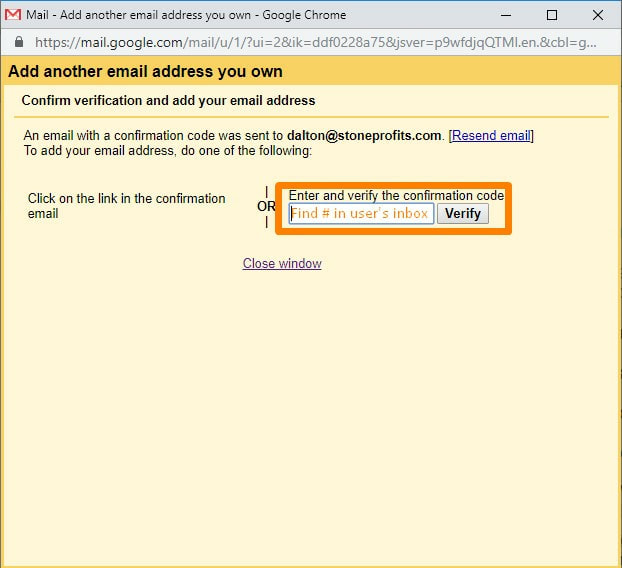
A.) The name/email entered here will be the reply address the customer will see when the specified user sends emails from the system. Enter the Name/Email Address, then click "Next Step"to continue.
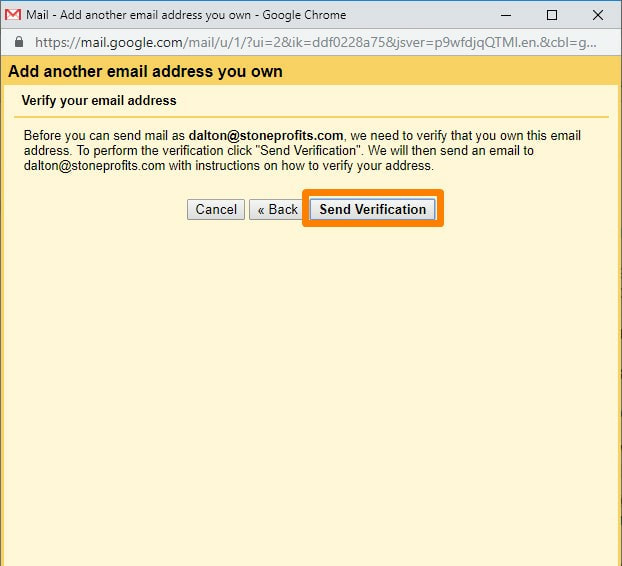
B.) Click "Send Verification" to email a verification code to the specified email address.
C.) Log into the email account to be verified and enter the code from the verification email into the textbox, then click "Verify" to finalize the changes.
You will need to repeat the above 3 steps for ALL USERS who will need to be shown as the reply to address in emails sent from SPS.
ADD YOUR OUTGOING EMAIL SETTINGS TO YOUR SYSTEM
To add the SMTP settings to your system, go to your company's Stone Profit System.
*The URL for your system is unique to your company. It's usually something like abccompany.stoneprofits.com, xyzcompany.stoneprofits.com, etc.
*The URL for your system is unique to your company. It's usually something like abccompany.stoneprofits.com, xyzcompany.stoneprofits.com, etc.
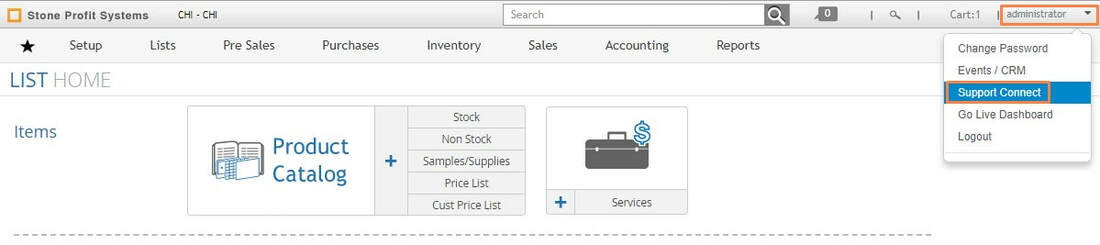
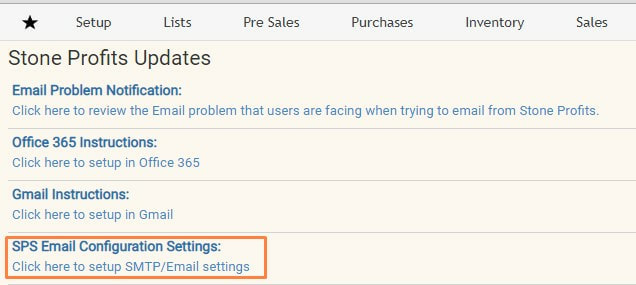
From this page, click into the "SPS Email Configuration Settings:"
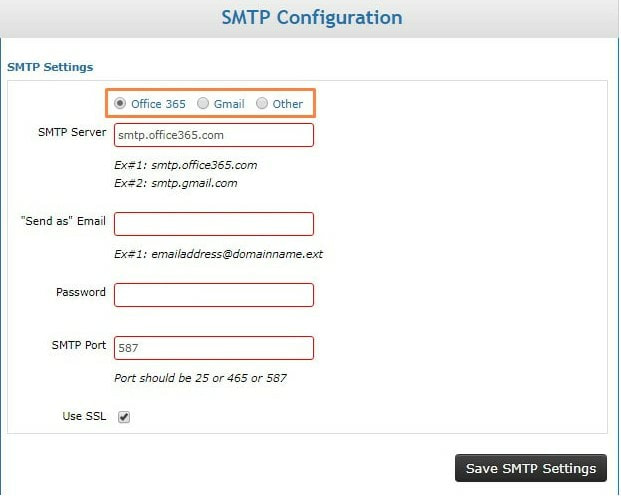
Select your email service provider from the options at the top of this page, then add the username/password for the email account you created for SPS.
Click the "Save SMTP Settings" button to save your settings.
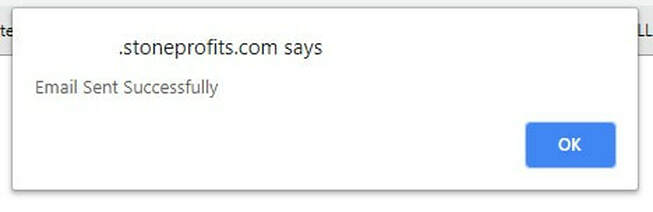
You can send a test email to yourself using the area below.
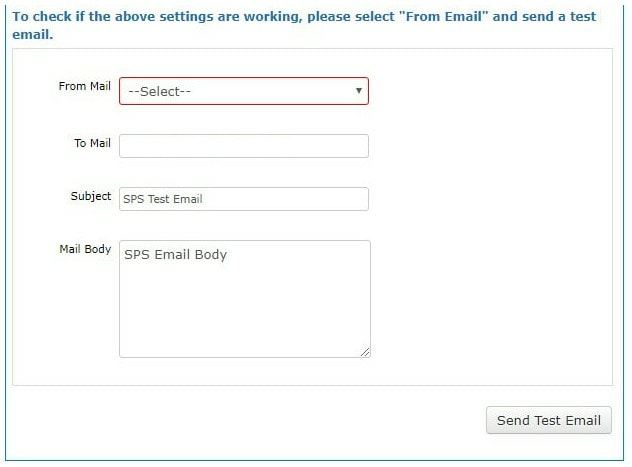
A pop-up will notify you whether the email was sent.
- If no pop-up appears, make sure pop-ups are not being blocked (walk-through article here).
- If you receive an error message, please re-check the steps above to make sure everything is set up correctly, then try again.