Stone Profits Help Manual
  • Home
  • Intro
  • Presales
  • Purchases
  • Inventory
  • Sales
  • Accounting
    • Receivables
    • Payables
    • Banking
    • General Ledger
  • Reports
  • Schedule
  • Contact Us
  • Home
  • Intro
  • Presales
  • Purchases
  • Inventory
  • Sales
  • Accounting
    • Receivables
    • Payables
    • Banking
    • General Ledger
  • Reports
  • Schedule
  • Contact Us
Stone Profits Help Manual

GENERAL LAYOUT / HOME PAGES

 
​Each home page menu section in Stone Profits includes components of the system which are most relevant for the users who would be accessing each given section. For user convenience, there are multiple ways to access the same part of the system. For example, you can find a link to the Product Catalog in the Lists Home, and also in the Inventory Home page because it is applicable to both.

HOME PAGE FLOWS

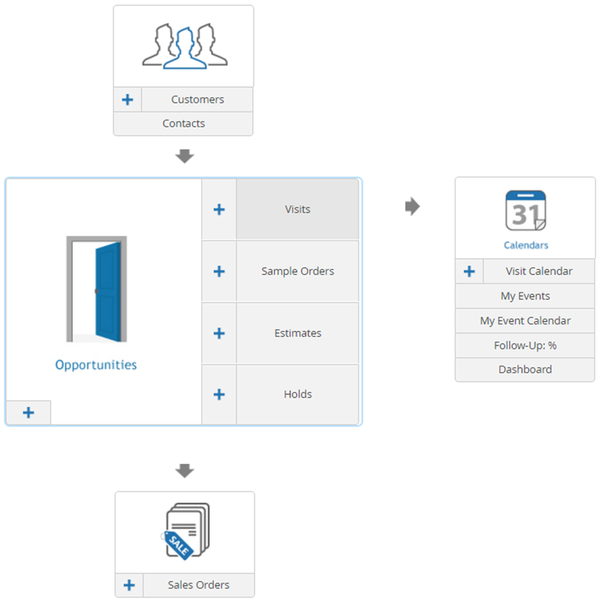
​In general, Stone Profits Home page menus are organized in the order which the process is completed in the system. Arrows point from sets of data which contribute to the creation of other transactions & data in the system.

Taking the Pre-Sales Home as an example (right):
  • A customer is the party you would create an Opportunity for, so the arrow under customers is indicating that your list of customers is feeding into the Opportunities.
  • Stone Profits users typically add events to their CRM Calendars from the detail page of the Opportunity/Pre-Sales items they create. For this reason, the section for the CRM Calendars is located to the right of an arrow pointing from the Pre-Sales items.
  • Pre-Sales data is converted into Sales Orders, so the arrow points down from the Opportunities section to Sales Orders. 
Picture

NAVIGATING SPECIFIC AREAS

After clicking buttons on Home Page menus, you'll usually be presented with one of two pages:
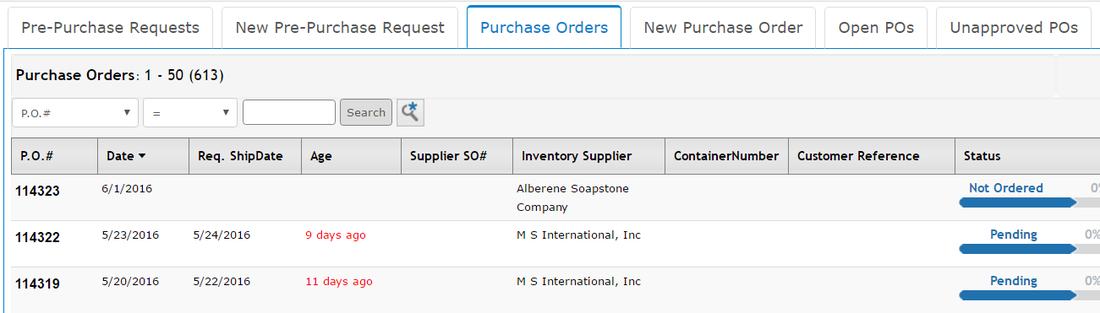
  1. A list page with all items/transactions for the specified filter. These will have columns which are most useful for that item/transaction. Most text listed on these pages are linked to their detail page.
  2. A "Create New" page (called "Update Page" if previously created), which will have various text fields to enter for that item/transaction. After you've entered all required fields and clicked the button to finish, the item/transaction will be listed on the list for that item/transaction respectively.
As shown below, a list page will have all items/transactions of that type (Purchase Orders in this case) with the most relevant columns of info. To the right of the actual tab "Purchase Orders," you'll notice the tab for "New Purchase Order." For convenience, it is typical for there to be a tab for creating new items/transactions near the list page tab, as well as other relevant tabs (Open POs, Unapproved POs). 
Picture
    Related Articles: 
    • Top Menu 
    • Detail Page
    • Create New Item Page
    • Create new Transaction​​